Introduction
In this blog post, we will walk through the process of setting up Microsoft Sentinel on Azure. We will cover the requirements, including having an Azure subscription and defining a naming convention. We will also go through the steps of creating a resource group, setting up Azure Log Analytics, and configuring data retention. Finally, we will install the Sentinel solution and enable free data connectors. By the end of this post, you will have a functionnal and free Microsoft Sentinel Solution.
Requirements
To be able to follow this document you will need to have an Azure Subscription I recommand you to read this before creating everything and define your own naming convention Naming Best Practices
FYI some resources cannot be renamed so be careful.
Resource Group
I recommand to create a new resource group that will be dedicated to Sentinel to do so :
Search for ‘Resource group’ in the search bar then click create
![image]()
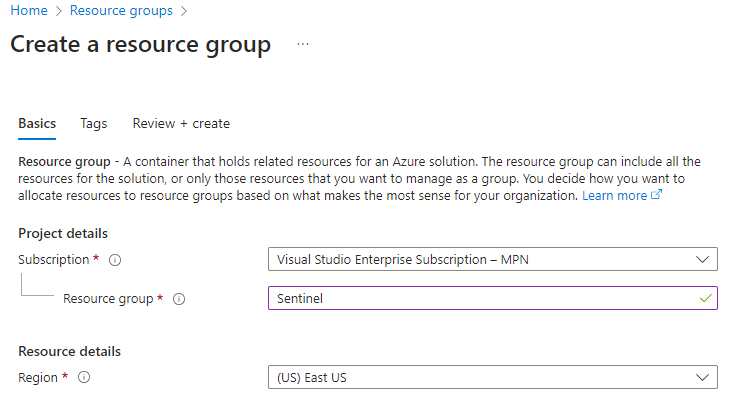
Fill the name, location, tags and create
![image]()

Azure Log Analytics
Now your logical container (Resource group) is ready we can add resource inside of it
Search for ‘Log Analytics Workspace’ in the search bar then click create
![image]()
Select the previously create resource group and fill name, region, tags and create
![image]()


You will have to wait a few minutes before the workspace is created, when ready click on ‘go to resource’
Data retention
By default the date retention is 30 days free of charge, however if you use Sentinel on this workspace (Spoiler we are going to use it) you can extend this free retention to 90 days so we are going to change this parameter
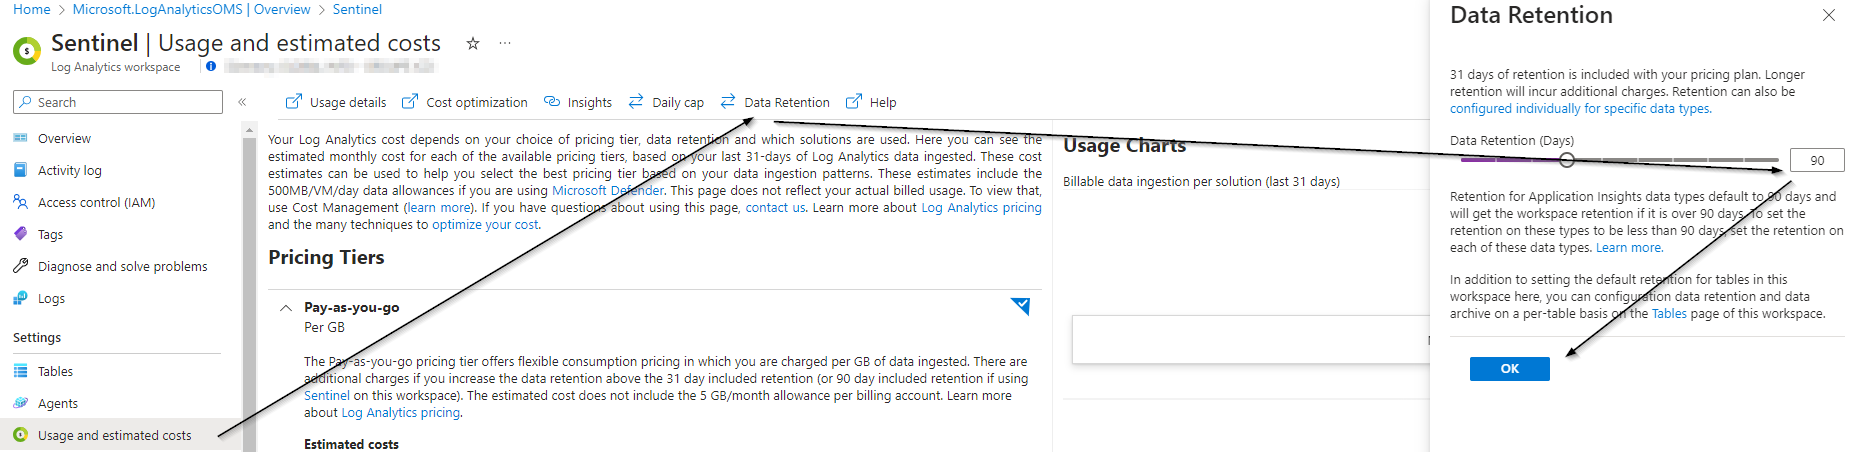
- To do so inside the Workspace go to Usage and Estimated Costs > Data Retention > Change the value > Ok
![image]()
Microsoft Sentinel Solution
Now we are going to install the Sentinel Solution on the workspace
Search for ‘Microsoft Sentinel’ in the search bar then click create
![image]()
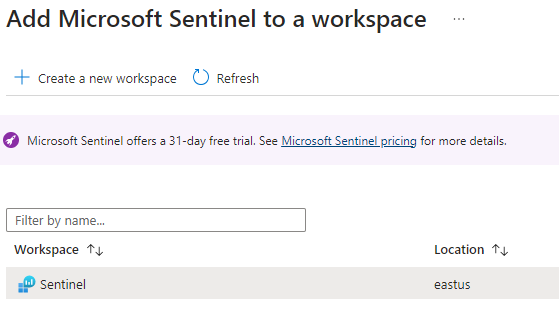
Select the log analytics workspace that we created previously and click add
![image]()

Sentinel Settings
By default Sentinel is not able to run automation (Logic App) so you have to configure it
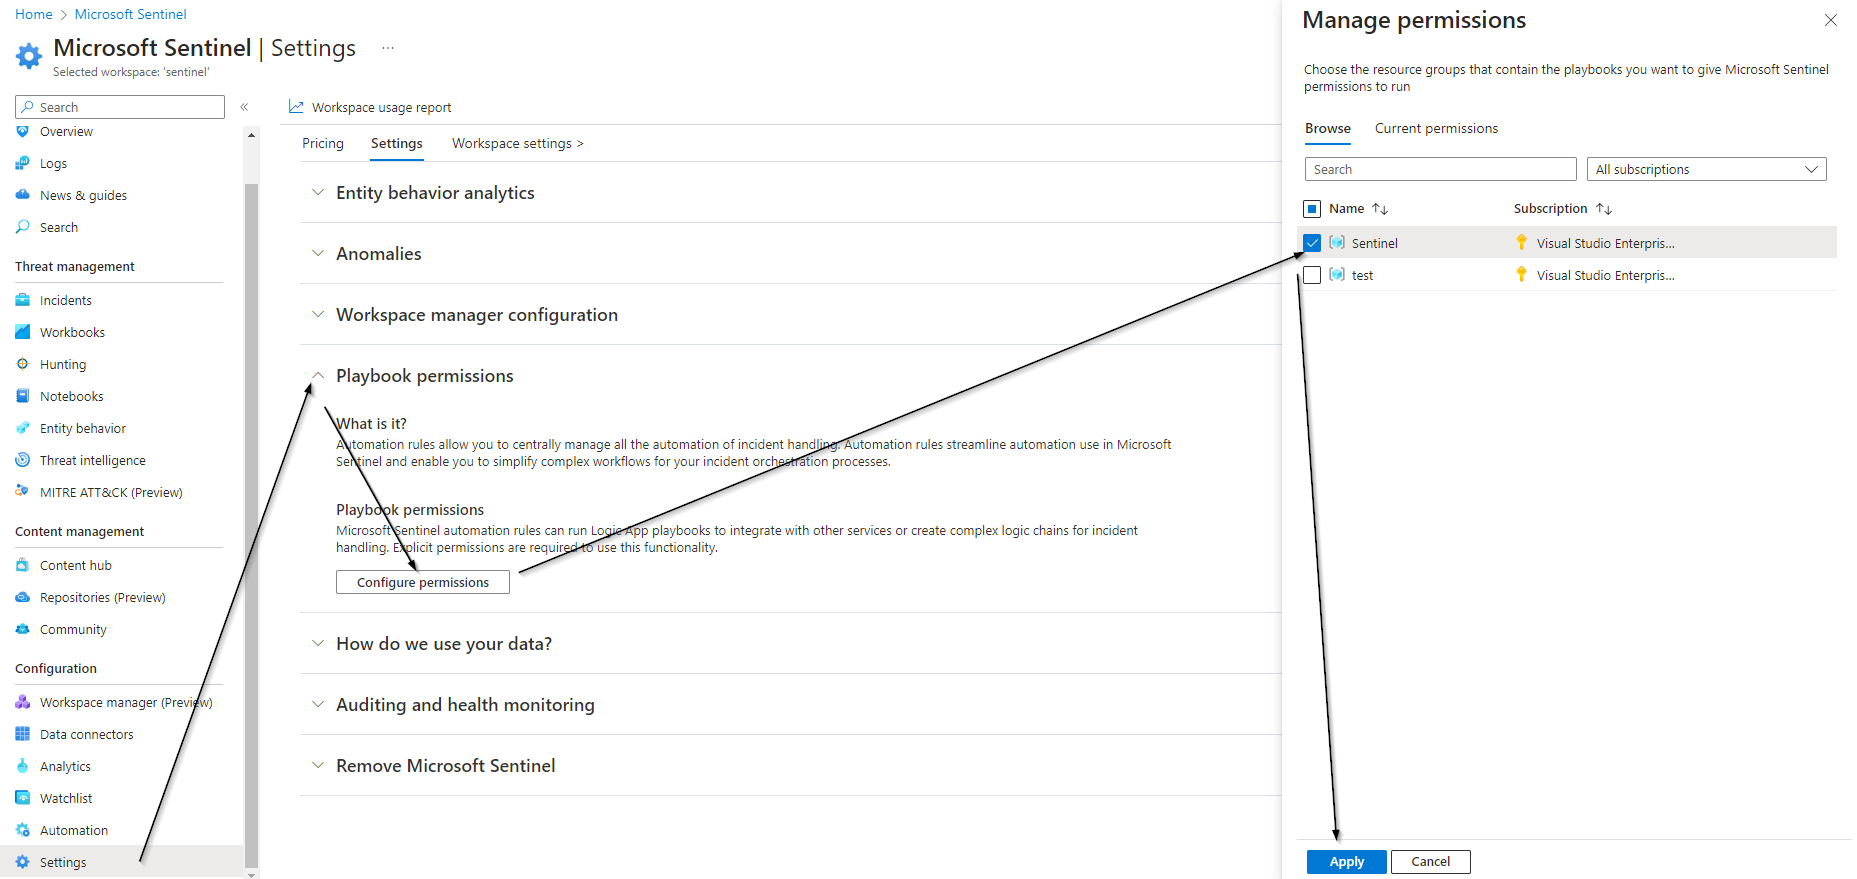
- Go to Settings > Playbook permissions > Select the resource group that will host your automation > Apply
![image]()
Free data connector
You should read the Pricing Article from Microsoft before continuing.
I recommand you to enable at least the free data connector so you can play with the solution here is the list
| Microsoft Sentinel data connector | Free data type |
|---|---|
| Azure Activity Logs | AzureActivity |
| Azure AD Identity Protection | SecurityAlert (IPC) |
| Office 365 | OfficeActivity (SharePoint), OfficeActivity (Exchange), OfficeActivity (Teams) |
| Microsoft Defender for Cloud | SecurityAlert (Defender for Cloud) |
| Microsoft Defender for IoT | SecurityAlert (Defender for IoT) |
| Microsoft 365 Defender | SecurityIncident, SecurityAlert |
| Microsoft Defender for Endpoint | SecurityAlert (MDATP) |
| Microsoft Defender for Identity | SecurityAlert (AATP) |
| Microsoft Defender for Cloud Apps | SecurityAlert (Defender for Cloud Apps) |
To enable a data connector do the following :
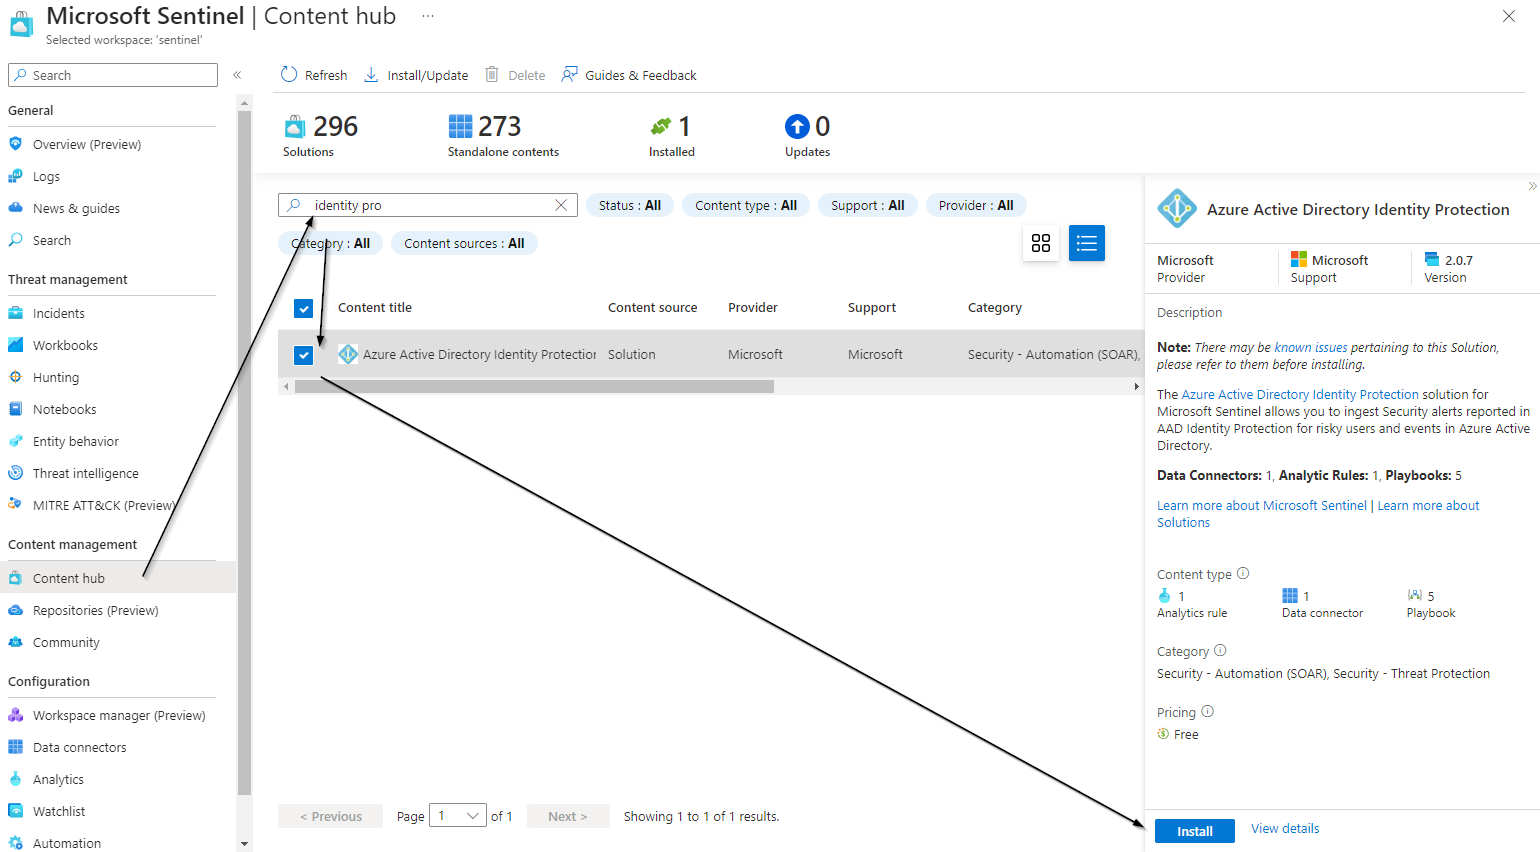
- Add the solution from the content Hub
![image]()
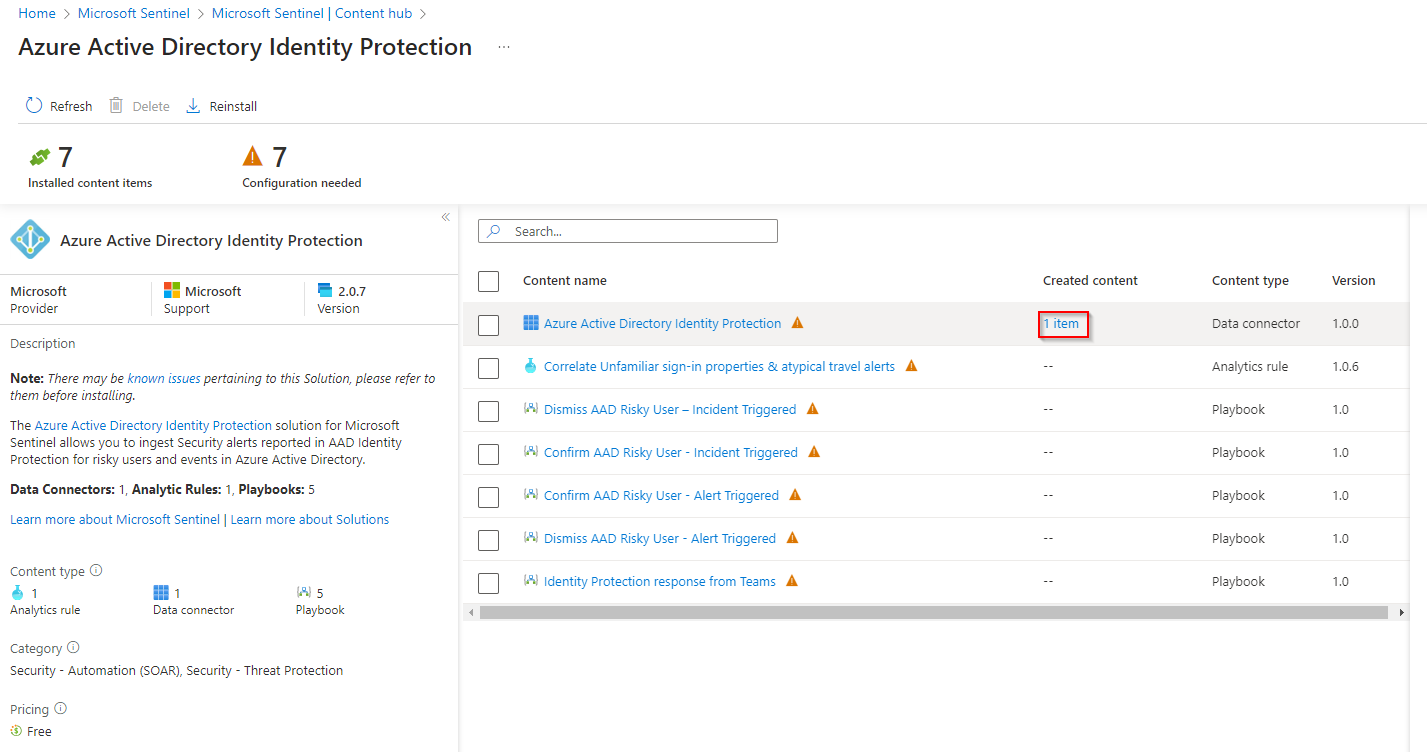
Manage the solution, as you can see there is multiple item in each solution i recommand you to enable the connector, analytics rules and workbook. If you enable automation it can lead to additionnal fee so be carefull.
![image]()
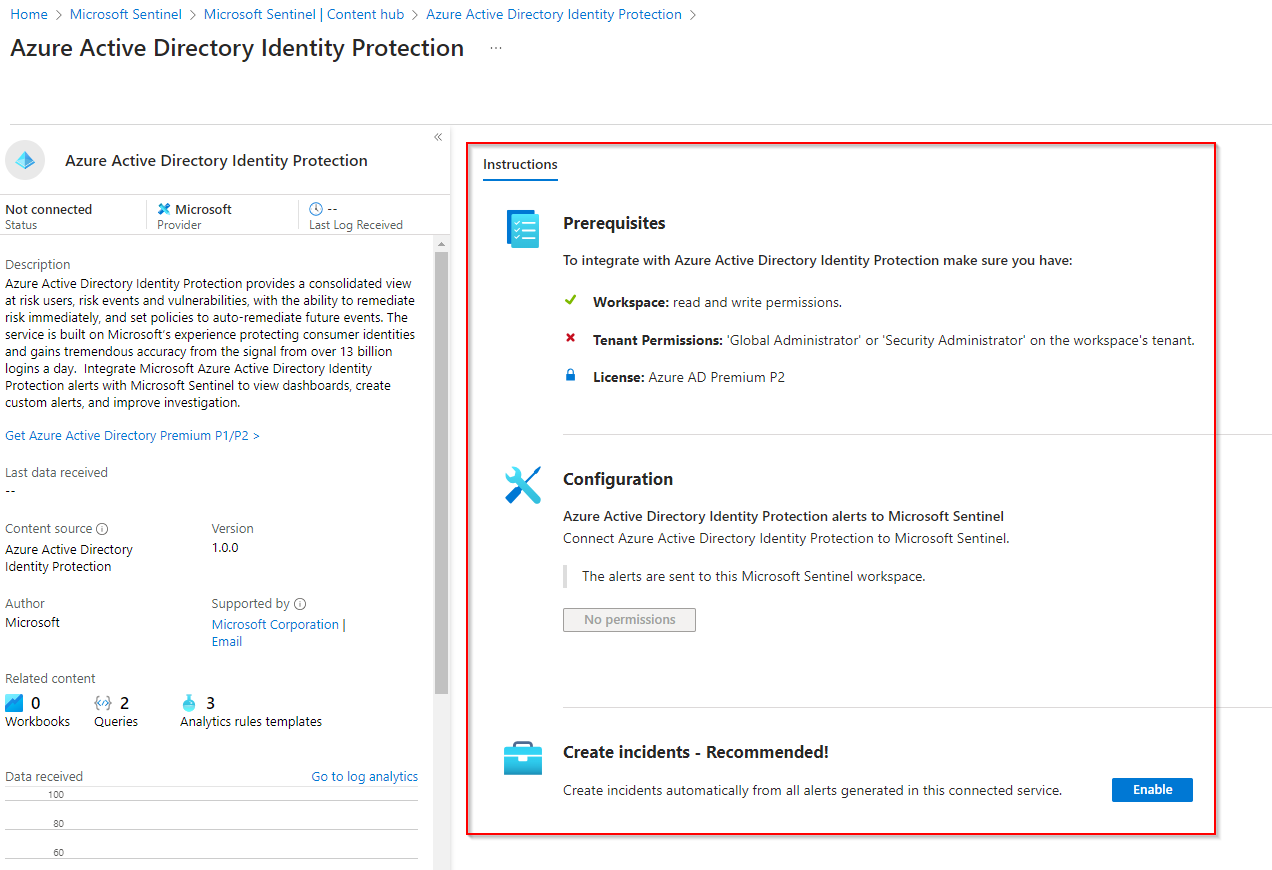
- Then follow the instructions on how to setup the data connector, please refer to the Microsoft documentation to know which data are paid and which are free
![image]()
Conclusion
Now you have a Microsoft Sentinel solution with some free ingested data and the basic configuration of sentinel